Original file preserved as uploaded. Some original headings or text are obscured; the text edition below is provided alongside it. No corrections have been made to the original.
THE DIRECTION AT A GLANCE
See the rolling path.
Six visual maps of the directions in your source. The arrows show the ball or roller’s path relative to the body. If the tool stays still, the body moves in the opposite direction.
Body regionTool path
Use these as direction cues, not exact pressure points or a body-position setup. The anatomical cutaways identify regions; they do not indicate pressure depth. Confirm the start, finish, and tissue corridor before rolling.
01
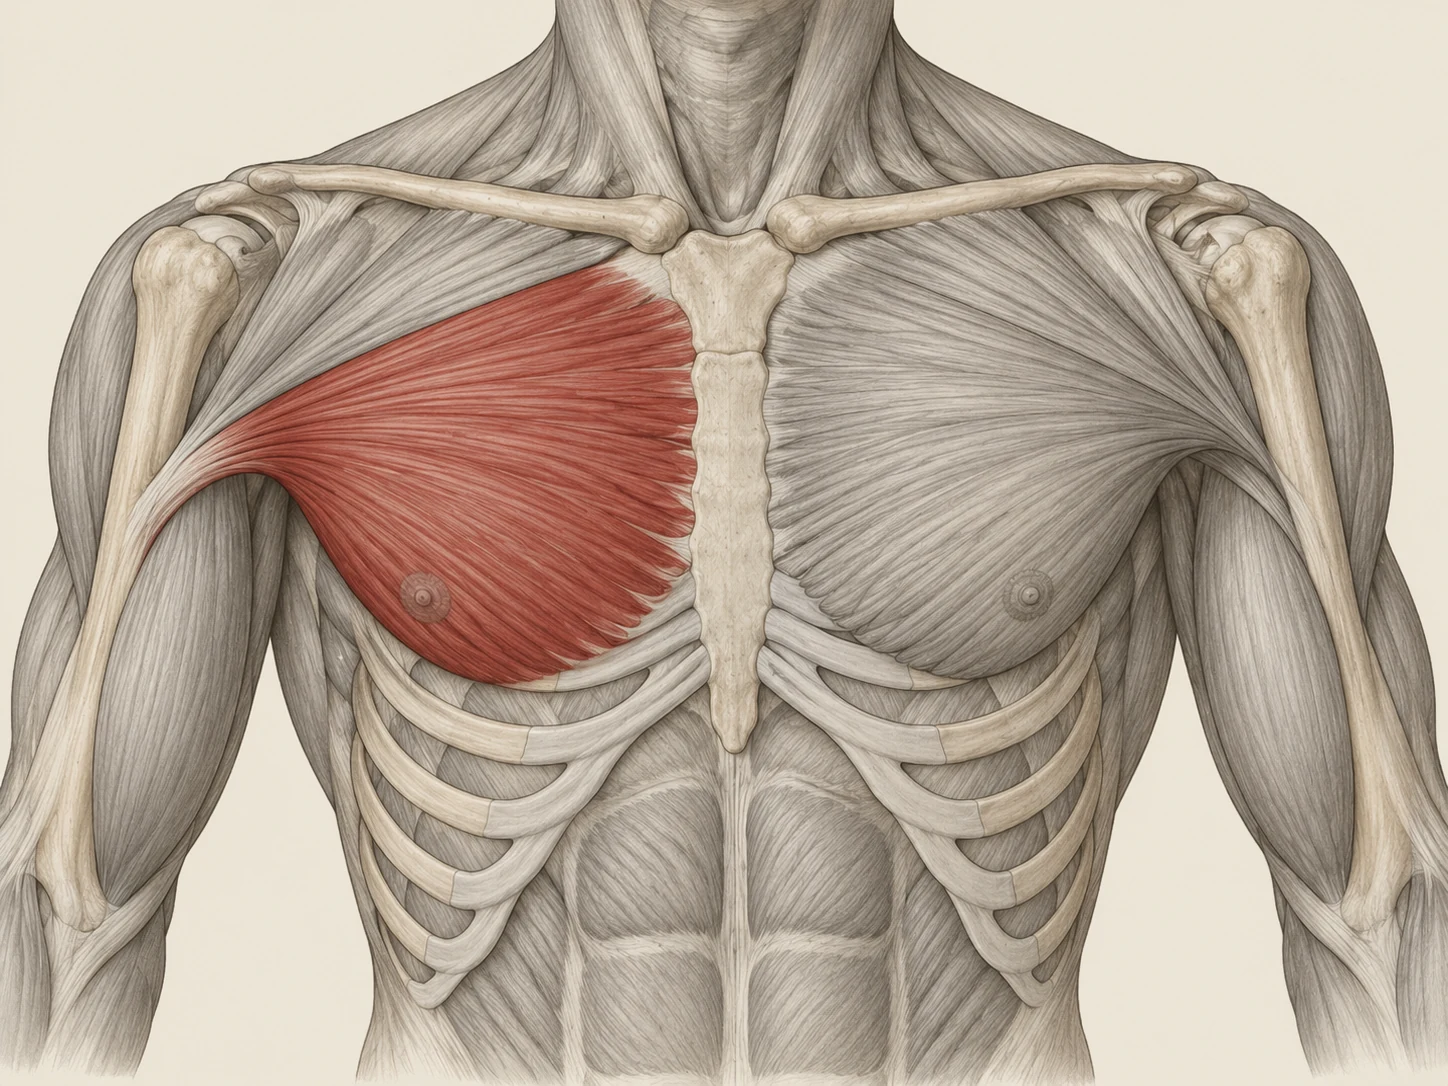
Sternal Pec
Anatomical front view · right chest
Distal → Proximal
Outer chest toward the breastbone
Travel inward across the sternal pec region. The arrow stops short of the breastbone.
Source wording & purpose
Path / direction
Distal → Proximal
Primary purpose in current bank
Shoulder IR / anterior expansion access
02
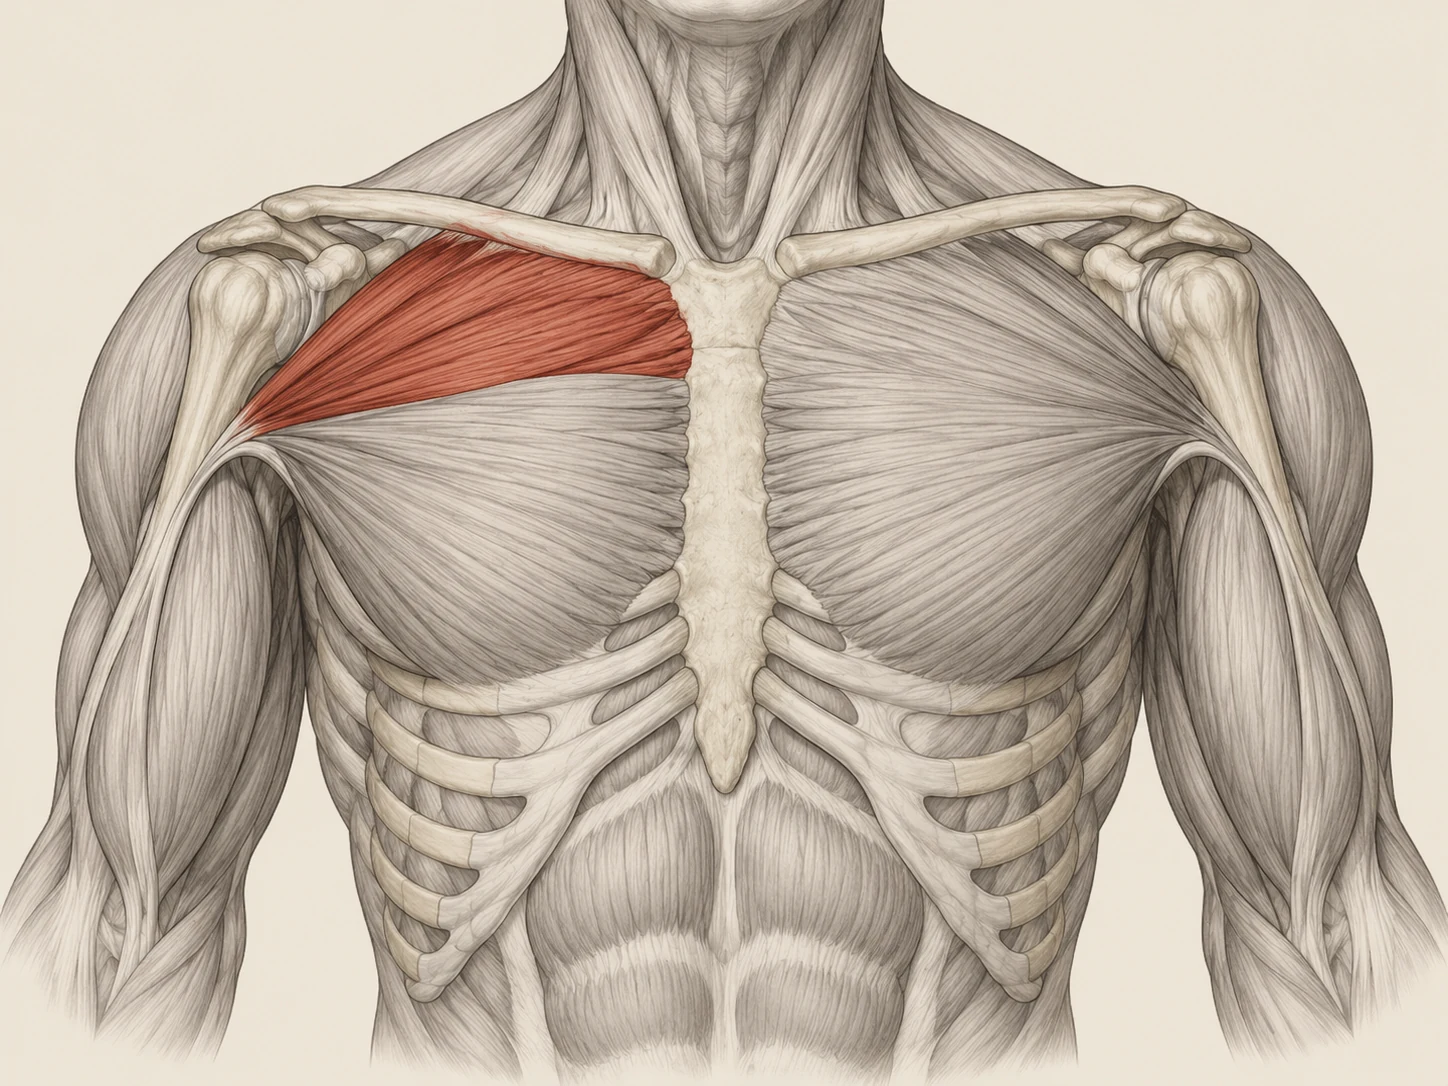
Clavicular Pec
Anatomical front view · right upper chest
Proximal → Distal
Inner upper chest toward the upper arm
Travel outward through the upper pec region, below the collarbone. Stay out of the armpit.
Source wording & purpose
Path / direction
Proximal → Distal
Primary purpose in current bank
Shoulder IR / anterior upper ribcage access
03
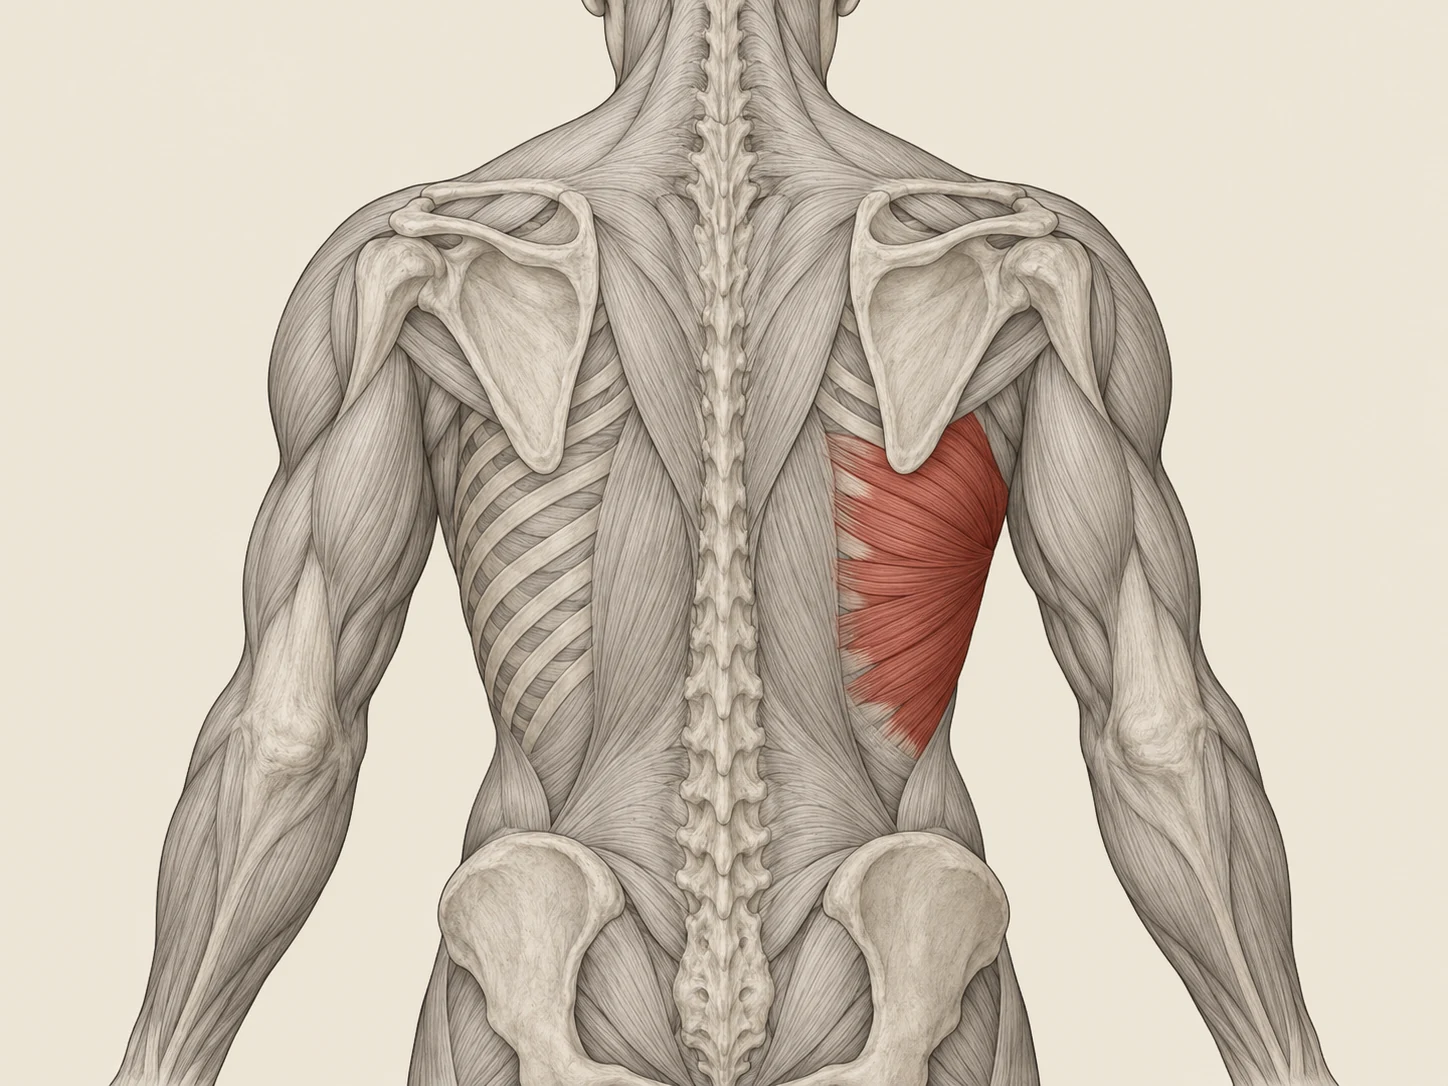
Up-Down Rib Cage
Anatomical back view · right rib-cage region
Up / Down emphasis
Up and down the back of the rib cage
The double-ended arrow shows the source’s up/down emphasis. It does not specify which direction comes first. Keep the path beside the spine.
Source wording & purpose
Path / direction
Up / Down emphasis
Primary purpose in current bank
Posterior ribcage expansion; shoulder ER/flexion
04
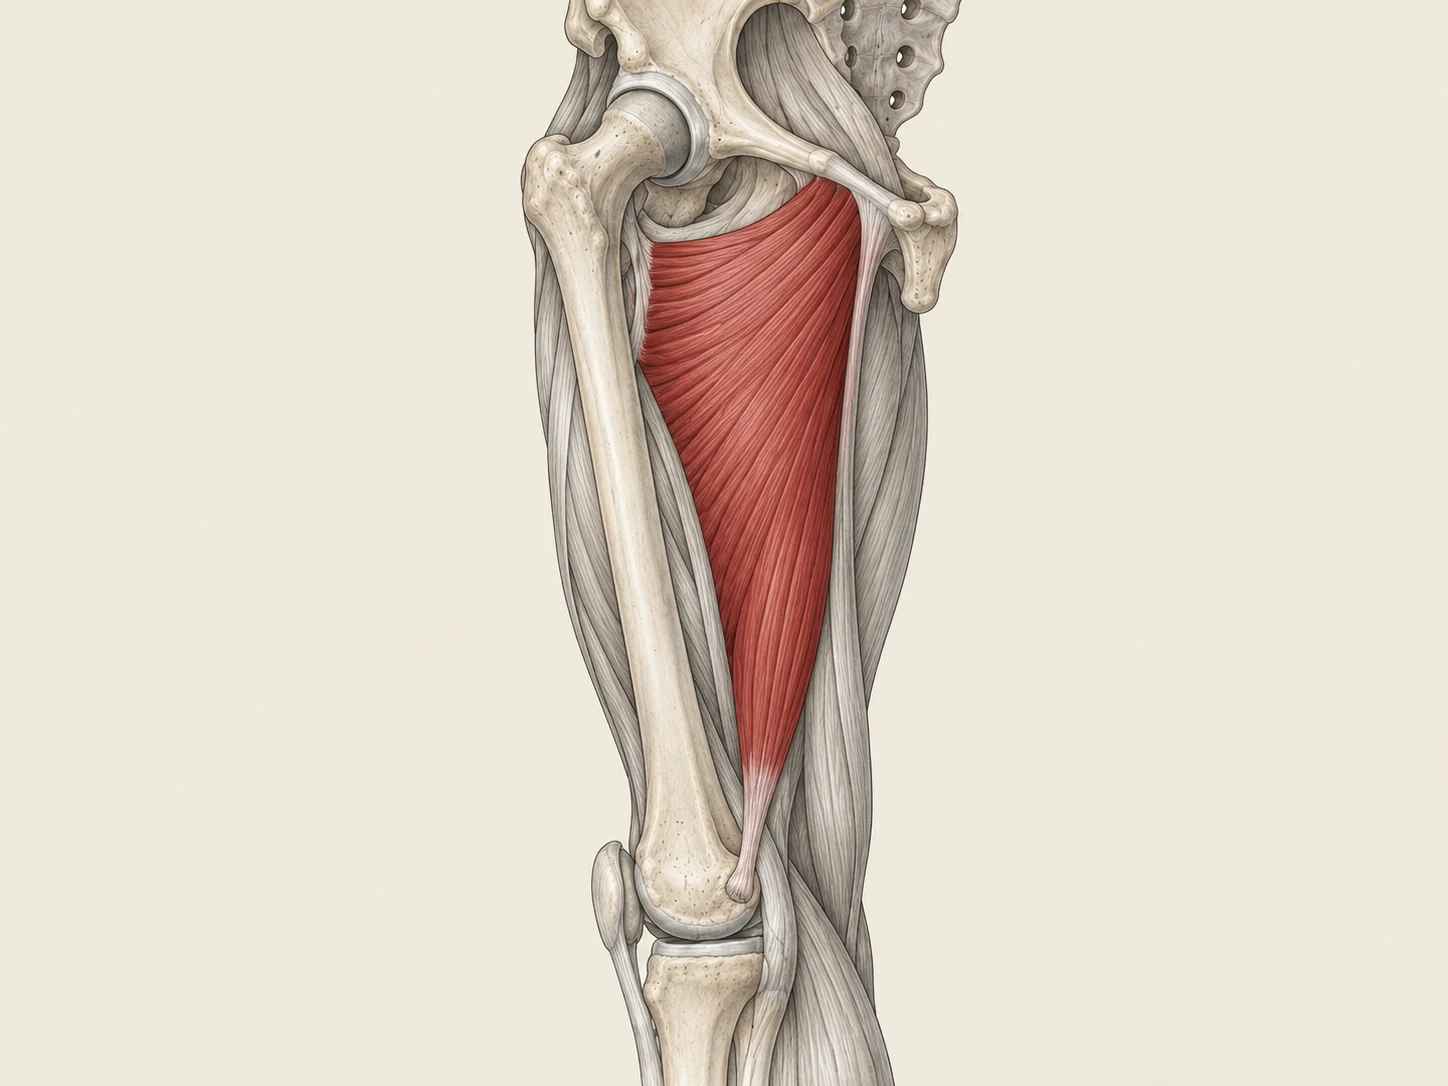
Adductor Magnus
Medial anatomical cutaway · right thigh
Distal → Proximal
Lower inner thigh toward the pelvis
Travel upward along the inner-thigh tissue. The arrow stays above the knee and below the groin.
Source wording & purpose
Path / direction
Distal → Proximal
Primary purpose in current bank
SLR; sometimes hip extension
05
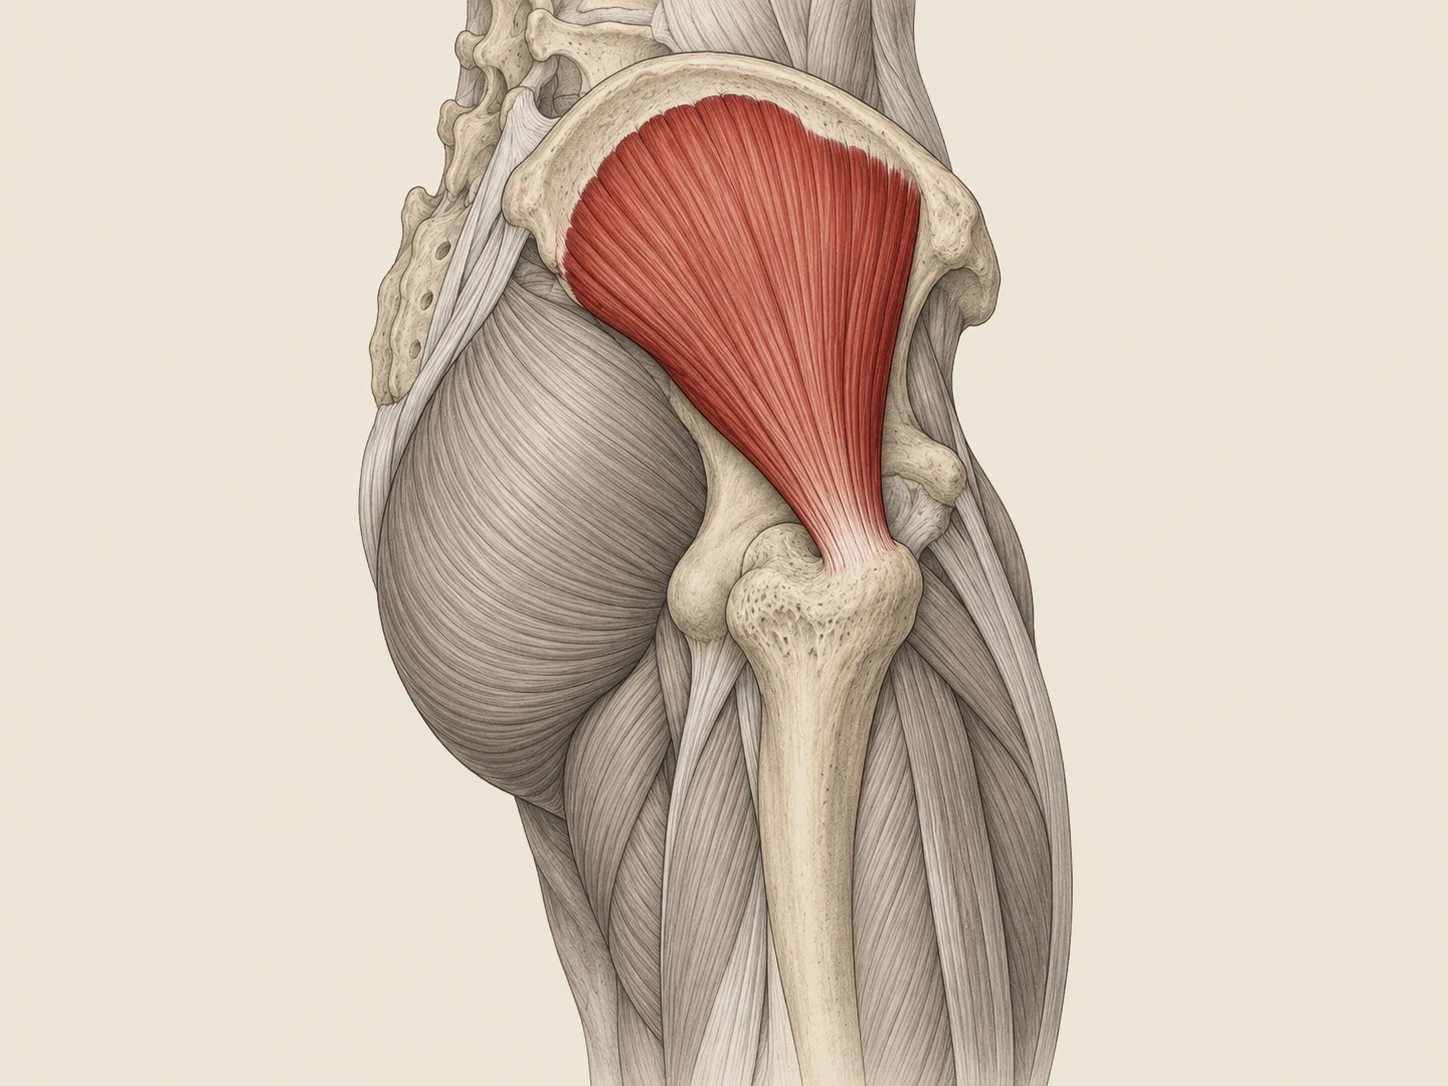
Glute Med
Lateral anatomical cutaway · right hip
Proximal → Distal
Upper outer hip toward the upper thigh
Travel down through the outer-hip muscle region. The arrow stops before the bony point on the side of the hip.
Source wording & purpose
Path / direction
Proximal → Distal
Primary purpose in current bank
SLR; sometimes hip extension
06
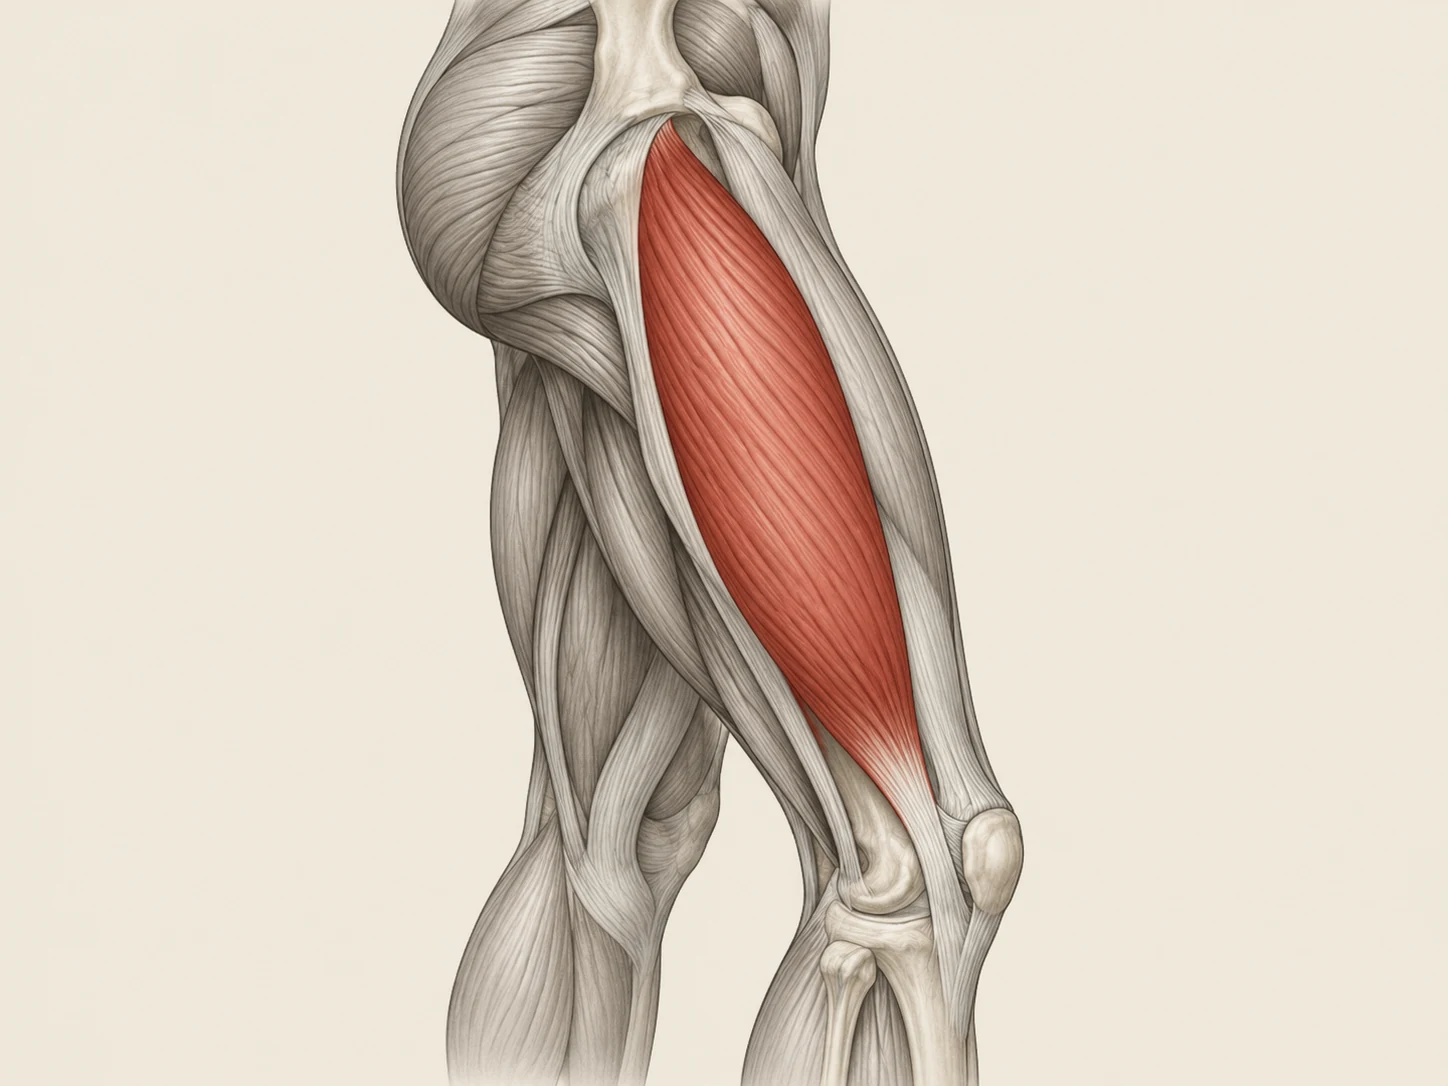
Vastus Lateralis
Lateral anatomical view · right thigh
Proximal → Distal
Upper outer thigh toward the knee
Travel down the outer-thigh muscle belly. The arrow stays above the knee joint.
Source wording & purpose
Path / direction
Proximal → Distal
Primary purpose in current bank
SLR; sometimes hip extension
New, simplified illustrations. Rolling directions follow the . Anatomical orientation checked against studies of the pectoralis major, adductor magnus, gluteus medius, and vastus lateralis. These diagrams do not establish the source model’s proposed effects.
Stay on tolerable soft tissue, not bone. Stop for sharp pain, numbness, tingling, radiating symptoms, or protective bracing. These are study examples, not complete drill instructions; the referenced Phase 1 Swayback Bank is not included here.
About this text edition
Text reproduced from the uploaded document. This text view does not reproduce original illustrations, color coding, or page layout. Use the document links above to view the original layout. Table columns in the extracted text may not retain their relationships.
Source page 1
Movement with Kev - Rolling Waypoint Model Page 1
MOVEMENT WITH KEV
ROLLING WAYPOINT MODEL
Coach Study Binder - A mental map for deliberate rolling
THE MODEL
WAYPOINT -> DESTINATION -> PATHWAY -> PRESSURE -> EXPAND -> RETEST
The goal is not to wander around looking for a painful spot. Give the client a clear starting reference, a destination, and a
tissue corridor between the two. Use tolerable pressure, preserve breathing, then retest the movement or expansion target.
STEP MENTAL QUESTION STOCK CUE
1. PRIMARY WAYPOINT Where do we start? Find your primary waypoint.
2. DESTINATION WAYPOINT Where are we going? Find your destination waypoint.
3. PATHWAY What tissue corridor connects them? Connect waypoint to waypoint.
4. PRESSURE How much input do we need? Pressure without guarding.
5. EXPAND Where are we trying to create room? Breathe into the space we're trying to open.
6. RETEST Did the input change anything? Same test. Same setup. What changed?
1. PRIMARY WAYPOINT - START
Purpose: Give the ball or roller a repeatable anatomical starting reference.
Stock language: Find your primary waypoint. - Set the ball here. - This is home base. - Start on tissue, not bone. - Know
where you are before you move.
2. DESTINATION WAYPOINT - END
Purpose: Define the direction before the roll begins.
Stock language: Find your destination. - That's where we're traveling. - See the finish before you start. - We are going
from here to here.
3. PATHWAY - CONNECT
Purpose: Create a deliberate tissue corridor between the two landmarks.
Stock language: Connect waypoint to waypoint. - Stay in the tissue corridor. - Follow the pathway; don't wander. - Slow
enough to know where you are. - One clean line.
Directional vocabulary: Distal to proximal. - Proximal to distal. - Up to down. - Down to up. - Inner to outer. - Outer to
inner.
4. PRESSURE - INPUT
Purpose: Create useful sensory input without provoking guarding.
Stock language: Pressure without guarding. - Sink into the tissue; don't attack it. - Enough pressure to create input, not
defense. - More pressure is not automatically better. - If you can't breathe, back off.
Stop / redirect: Bone, sharp pain, numbness, tingling, radiating symptoms, or protective bracing are not the target.
5. EXPAND - CREATE ROOM
Source page 2
Movement with Kev - Rolling Waypoint Model Page 2
Purpose: Link the rolling input to the movement or ribcage space you are trying to make more available.
Stock language: Breathe into the space we're trying to open. - Make room here. - Let the inhale spread into this region. -
Don't force the breath. - Keep the pressure and let the ribs move.
Language rule: Rather than claiming the ball literally pushes expansion through muscle fibers, describe the rolling path as
an input intended to reduce compression / create space, then verify the result with breathing and retesting.
6. RETEST - VERIFY
Purpose: Rolling earns its place by changing the relevant test, movement, ease, symmetry, or symptoms without creating
a new compensation.
Stock language: Same test. Same setup. - More range? - Easier? - Cleaner? - Did we create space? - Did it survive
standing or walking?
Decision rule: Better? Keep it. - Same? Maybe. - Worse? Lose it.
Source page 3
Movement with Kev - Rolling Waypoint Model Page 3
HOW IT FITS THE MOVEMENT WITH KEV SYSTEM
Main framework:
POSITION -> CONTACTS -> STACK -> ACTIVATE -> EXECUTE -> EXPAND / COMPRESS ->
BREATHE -> RETEST
Rolling-specific framework:
WAYPOINT -> DESTINATION -> PATHWAY -> PRESSURE -> EXPAND -> RETEST
For rolling, the waypoint/pathway system becomes the specialized version of CONTACTS + EXECUTE. You still establish
a comfortable position, keep the neck and jaw quiet, breathe, and retest.
THE DEFAULT ROLLING SCRIPT
Find your primary waypoint.
Find your destination.
Connect the two.
Stay in the tissue corridor.
Pressure without guarding.
Breathe into the space we're trying to create.
Now let's retest.
STUDY EXAMPLES FROM THE CURRENT PHASE 1 BANK
ROLL PATH / DIRECTION PRIMARY PURPOSE IN CURRENT BANK
Sternal Pec Distal -> Proximal Shoulder IR / anterior expansion access
Clavicular Pec Proximal -> Distal Shoulder IR / anterior upper ribcage access
Up-Down Rib Cage Up / Down emphasis Posterior ribcage expansion; shoulder ER/flexion
Adductor Magnus Distal -> Proximal SLR; sometimes hip extension
Glute Med Proximal -> Distal SLR; sometimes hip extension
Vastus Lateralis Proximal -> Distal SLR; sometimes hip extension
Memory line: Start somewhere. Know where you're going. Follow the path. Control the pressure.
Create room. Prove it with the retest.
Source basis: Movement with Kev Phase 1 Swayback Bank. The bank describes rolling as a low-threat input, uses directional rolling paths for
multiple drills, and requires retesting rather than assuming more pressure is more effective.
Educational study material. Not medical diagnosis, treatment, or individualized exercise clearance.